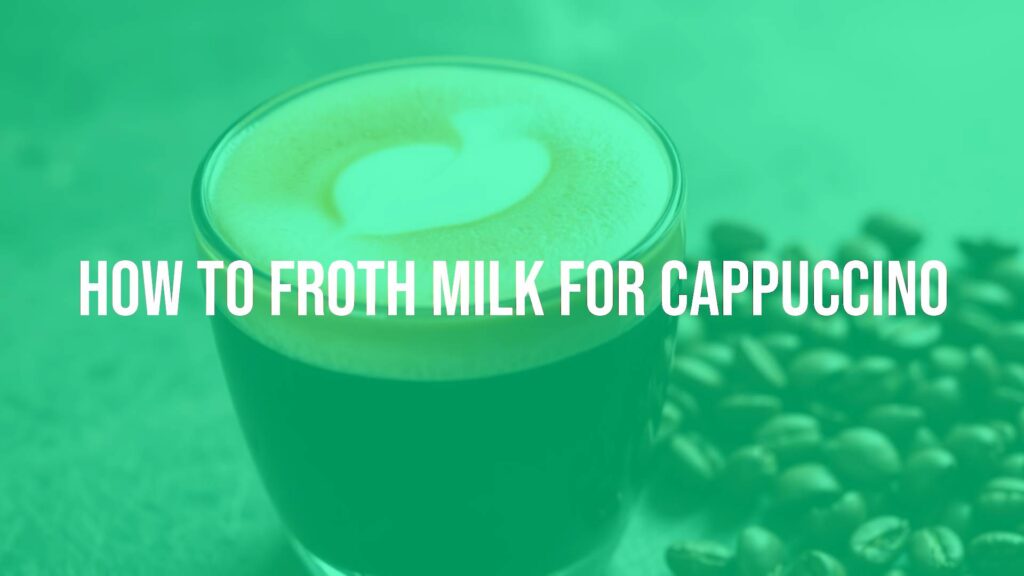
Learning how to froth milk for cappuccino is one of the most enjoyable skills for any coffee lover to pick up. It takes a simple espresso and turns it into a rich, creamy drink that feels like a treat. The key is making “microfoam”-smooth, pourable foam with tiny bubbles that blend well with coffee, giving it a nice creamy taste and texture. If you’ve wondered how coffee shop baristas create that soft, foamy layer on top, this guide will show you how. We’ll cover everything from picking the right milk to fixing common mistakes. By the end, you’ll know just what you need to make cappuccinos that taste and look great every time.
What Is Frothing Milk for Cappuccino?
Frothing milk means adding air into milk while you heat it, making it creamy and light. The main goal is to make microfoam-a foam with extra-small, even bubbles. Good microfoam looks smooth and shiny, and mixes well with espresso, making the drink taste richer and a little sweeter. You want a foam that pours well, almost as if it’s liquid. If you see large bubbles, the milk wasn’t frothed right. The difference between well-frothed milk and poorly-frothed milk is easy to notice both by look and taste. Getting this right isn’t complicated, but it does take some practice and attention to detail.

Why Do You Need Frothed Milk for Cappuccino?
Frothed milk is not just a decoration for cappuccino-it shapes the drink itself. A real cappuccino only works with microfoam. This step isn’t just for showing off; it changes how the drink tastes, feels, and looks. When air and heat are added to milk, it becomes sweeter and smoother, making the drink taste better and feel nicer in your mouth. The microfoam balances the rich flavor of the espresso and lets you make latte art, which many find is part of the fun of cappuccino. Without good milk foam, a cappuccino would just be hot milk and coffee. Great froth also helps with pouring patterns, letting you impress friends with nice-looking drinks.
Steaming vs. Frothing Milk
People sometimes mix up “steaming” and “frothing”, but they mean different steps in making coffee drinks. Frothing is when you add air to the milk to make foam, which increases the amount of milk in your jug. Steaming is about heating the milk up and mixing the air you already added so the foam becomes smooth and shiny. Both things happen at the same time when you use a steam wand, but knowing the difference helps you do each part properly. Frothing makes the bubbles, and steaming breaks down big bubbles and heats the milk to the right temperature for pouring.
Which Milk Should You Use for Frothing?
The type of milk you use matters a lot for getting good froth. Different milks have different amounts of protein and fat, and both affect how easy it is to make good foam. Proteins help the milk trap air, and fat makes the milk creamy and keeps the foam from falling apart. Trying different types can give you different results in your cappuccino.
Plant-based milks are also popular now. Each kind reacts differently when you try to make foam, and some are easier to work with than others. Knowing how various milks behave will help you get good froth every time, no matter your preference or dietary needs.
Which Milk Works Best for Microfoam?
Whole milk is the favorite for many baristas. Its fat makes it creamy, and it creates a smooth, long-lasting foam that’s easy to pour and shape. The proteins also help trap air nicely. Skim milk has more protein for its size, so it can make a lot of foam, but the foam tends to be lighter and less creamy-sometimes with bigger bubbles that don’t last as long. Reduced-fat milk is somewhere in between. For the best-tasting cappuccino with smooth foam, whole milk is usually the top pick.
Comparing Dairy and Plant-Based Milks for Frothing
| Type of Milk | Frothing Quality | Taste/Texture |
|---|---|---|
| Whole Dairy Milk | Excellent microfoam, stable | Creamy, rich |
| Skim Dairy Milk | Lots of foam, larger bubbles | Light, less creamy |
| Oat Milk (“Barista Blend”) | Good microfoam, stable | Creamy, mild flavor |
| Almond Milk | Harder to froth, bigger bubbles | Thin, may taste nutty |
| Soy Milk | Can froth, sometimes curdles | Mild to strong taste |
| Coconut Milk | Difficult, foam isn’t stable | Creamy, coconut flavor |

Plant-based “barista” milks have extra ingredients that help them froth more like real milk. If you want to use plant-based, start with oat or a barista oat blend for easy results.
How Milk Temperature Affects Froth
The temperature of your milk affects both foam and taste. Always start with fresh, cold milk-this gives you more time to add air and make the microfoam before it gets too hot. As you heat milk, its proteins change, allowing them to trap air better. However, if milk gets too hot, the foam breaks down and the milk tastes burnt. The best final temperature is about 65-70°C (150-160°F). If you don’t have a thermometer, stop steaming when the jug is just too hot to keep your hand on comfortably. Overheated milk loses sweetness and the foam falls apart.
Step-by-Step Instructions: How to Froth Milk for Cappuccino
Making good froth for cappuccino might look hard at first, but if you follow these clear steps, you’ll be making coffee shop-level drinks at home. Below you’ll find how to prepare, choose the right amount of milk, and make foam with both a steam wand and simple tools you might already own.
How Much Milk for One Cappuccino?
For one cappuccino (6 or 8 ounces), fill your milk jug about a third to a half full. Milk will grow in volume as you froth, so you need extra room. If you use too much, it will spill; too little won’t let the steam wand move freely and make proper foam. An increase of about 50% in volume is normal. For a 6-ounce cappuccino, start with about 4-5 ounces of cold milk. Always use cold, fresh milk for best results.
Getting Your Tools Ready
Good frothing starts with clean equipment. Use a stainless steel jug-it reacts to heat so you’ll know how hot your milk is. Make sure your jug is totally clean; leftover milk or soap will mess up your froth. If you have a steam wand, purge it before use by letting some steam out for a few seconds to clear any water inside. Wipe the wand after. Have a thermometer ready if you want, and keep your milk cold until the moment you start.
How to Froth Milk with a Steam Wand
- Fill the Jug: Add cold milk to the jug (1/3-1/2 full).
- Purge the Wand: Steam the wand briefly to clear any water.
- Position the Wand: Put the tip just below the milk’s surface, near the jug’s edge for one-hole wands or center for multi-hole wands.
- Add Air: Turn on the steam fully. Listen for a light chirping sound-this means air is getting in. Lower the jug as the milk grows, keeping the tip near the surface and adding air until it’s warm (about 40°C/100°F). Don’t make large bubbles.
- Heat and Mix: Move the wand a bit deeper to swirl the milk and make the foam smooth. Keep warming until the jug is too hot to touch or you hit 65-70°C (150-160°F).
- Turn Off and Clean: Switch off the steam before removing the jug. Wipe the wand right away.
- Tap and Swirl: Tap the jug to pop any big bubbles, then swirl to mix everything into a glossy, even milk.

Now pour the milk over your espresso-your cappuccino is ready!
How to Froth Milk Without a Steam Wand
- Handheld Frother: Heat milk to 60-70°C (140-160°F). Place the tip just under the milk and turn it on. Froth for 30-60 seconds, moving up and down. Tap the cup to pop big bubbles.
- French Press: Warm up your milk and pour into the French press. Pump the plunger quickly up and down for around 30-60 seconds. Let it settle and swirl before pouring.
- Whisk: Warm your milk, then whisk it quickly for a minute or so. This takes more effort, and it may make larger bubbles, but it still works. Whisk cold milk if you want extra foam, then gently heat it.
- Mason Jar: Put cold milk in a jar, screw the lid on tightly, and shake for 30-60 seconds until it’s foamy. Remove the lid and microwave for 30-60 seconds to warm it and set the foam. Tap the jar to pop bubbles.

These methods won’t give you the smoothest foam but do a good job for home cappuccinos without a steam wand.
Reading the Signs: What to Look and Listen for
You’ll get better with practice as you learn the signs of good microfoam. Here’s what to notice:
- Sounds: At first, listen for a steady, high “chirping” sound as you add air. If you hear splattering, the tip is too high. No sound means the tip is too deep and adding no air.
- Sights: As you froth, the milk should grow about 50% in volume with a layer of fine bubbles. In the heating phase, a good swirl (whirlpool) is important to blend the foam. When finished, the milk will look shiny and paint-like, with no large bubbles on top.
Common Milk Frothing Problems and Solutions
Even experienced baristas make mistakes. If your froth isn’t turning out right, don’t worry-here are some common problems and easy fixes.
Why Won’t My Milk Froth?
- Tip Too Deep: If the steam wand is too far under the surface, it will just heat the milk without adding air. Keep the tip near the surface at first.
- Weak Steam: Some machines need to warm up longer. Wait until you have strong, steady steam before starting.
- Milk Not Cold or Fresh: Old or warm milk doesn’t froth well. Always use fresh, cold milk from the fridge.
- Dirty Wand: A blocked steam wand can’t make enough steam. Clean it before use.
How to Fix Large Bubbles and Get Smoother Foam
- Big Bubbles: If you see bubbles, you’re adding air too fast or not mixing foam into the milk properly. Slow down, listen for the soft chirp, and move to the mixing phase as soon as the milk grows by about half.
- Not Mixing Enough: In the mixing step, make sure the milk is swirling strongly to blend bubbles. After frothing, tap and swirl the jug to smooth out any bubble patches.
How to Avoid Scalding and Bad Taste
- Too Hot: Heating milk too much makes it taste burnt and ruins foam. Stop steaming when your jug is just too hot to touch or at 65-70°C, not higher.
- Work Quickly: Smaller amounts of milk can heat up fast, so pay attention. Never leave milk heating unattended.
How Microfoam Changes Cappuccinos
Microfoam does more than look nice-it affects the taste, texture, and look of your drink. Smooth, creamy foam makes each sip feel rich and blends with coffee for better taste. Plus, microfoam is the only way to make latte art, adding a fun and impressive touch to your cappuccino and making the experience more enjoyable.
Impact on Taste and Texture
Good microfoam has tiny bubbles that make milk taste naturally sweet (as the heat breaks down sugars in milk). This balances the coffee’s strong flavor and makes every sip feel creamy and smooth, like wet paint. Bad foam, with big bubbles, feels dry or airy, won’t blend well with the coffee, and doesn’t taste as nice.
Why Good Froth Matters for Latte Art
Latte art isn’t possible without the right foam. Microfoam is glossy and runs smoothly, so you can pour patterns as the milk mixes with espresso. If the foam is too thick or bubbly, it just sits on top and doesn’t blend. If it’s too thin, it disappears. Even as a beginner, with a bit of practice you can pour basic art in smaller cups after a few months by working on your frothing technique.

Pro Tips for Frothing Milk
Small habits can make a big difference in milk frothing. Here are some helpful hints to keep things simple and effective:
How to Clean Your Frothing Gear
- Always wipe and clean the steam wand as soon as you finish frothing (it gets hot-use a damp cloth).
- Purge the steam wand before and after each use to keep it clear of old milk.
- If necessary, take off the wand tip now and then to soak in a milk cleaner-use a pin to clear tiny holes if they clog.
- Keep your jug clean. Old milk or soap affects the foam and taste.
Common Mistakes to Watch For
- Too Much Air: Over-aerating makes stiff, soapy foam. Only add air in the first moments, not the whole time.
- Too Hot: Watch the heat-if using your hand, stop as soon as you can just hold the jug; with a thermometer, stop at 60°C and let it rise to the final temp.
- Dirty Wand: Not cleaning leads to blockages and bad flavors.
- No Swirl: Without a good swirl, big bubbles won’t mix in, and the foam won’t be as smooth.
- Warm or Old Milk: Always use fresh, cold milk for consistent, stable froth.
FAQs for Frothing Milk for Cappuccino
Here are some answers to questions that often come up when learning how to froth milk for cappuccino:
Can You Froth Cold Milk?
Yes, you can froth cold milk, but it won’t give the same microfoam as hot milk. Cold milk foam works for iced drinks, and most battery frothers can do this. The foam is lighter and won’t have the creamy, sweet feel you want in a cappuccino. For hot drinks, always heat the milk while you froth it.
Should You Add Sugar or Flavor Before Frothing?
Don’t add sugar or flavors before frothing-they can change how the milk foams and make it harder to get smooth microfoam. It’s better to add syrup, sugar, or flavors to your espresso before pouring the milk, or stir them into the finished drink. Powders especially can burn on the steam wand and ruin both texture and taste.
Can You Froth Milk Ahead of Time and Reheat?
It’s not a good idea to froth milk in advance and reheat it. Once frothed and cooled, milk changes and reheating breaks down the foam, making it watery or separating it completely. The taste can also turn “cooked” or burnt. Always make your froth fresh, as it only takes 10-40 seconds per cup.